Engine Degreaser

Much happens under the hood. Oil mist, dust, road grime, and the occasional mystery spill – it’s all there. A good engine degreaser doesn’t just make things look pretty; it helps you spot leaks early and keeps plastics, hoses, and metal from living under a film of gunk. We’re Chemical Guys, formulators, detail nerds, and the crew behind the product's pros stash in their carts.

3 products
 

Engine Degreaser 101: When (And Why) To Use It

Engines collect oil vapor, dust, and road film that bond to surfaces over time. Degreasing removes that layer so you can actually see what’s going on—belts, clamps, hose condition, and any fresh leaks. Clean doesn’t mean “pressure wash the ECU”; it means using the right product, respecting sensitive components, and working with low pressure and good drying. Our how-to playbook keeps it safe: cool engine, cover electronics, use sensible water pressure, and dry thoroughly. 

How To Degrease Your Engine Bay Safely (Simple 5-Step Method)

Before you touch a trigger, pop the hood and let things cool – no “pressure washer on stun” heroics here. Bag the intake, alternator, and battery/terminals, then give the bay a gentle pre-rinse to knock off loose dust. Mist on your engine degreaser of choice – Signature Series Orange for heavy grease, All Clean+ or Nonsense for routine grime – let it dwell 15 to 30 seconds, and agitate with a soft brush where needed. 

Keep water pressure low and rinse top-down so you’re guiding dirt off the car, not into connectors. Dry thoroughly with microfiber (compressed air is a bonus), remove your covers, and finish plastics and hoses with a light water-based dressing for that even, like-new look. Always test in an inconspicuous spot and mix concentrates to the mildest ratio that gets the job done, your future self will thank you.

  1. Cool + Cover. Let the engine cool. Bag the intake, alternator, and battery/terminals; remove big plastic covers for better access.
  2. Pre-Rinse Smart. Use a garden hose or low-pressure setting to knock loose dust—keep at least a foot from sensitive parts. 
  3. Spray The Right Engine Degreaser. Use Orange Degreaser for heavy grease; All Clean+ or Nonsense for routine cleaning. Let it dwell 15 to 30 seconds.
  4. Agitate Where Needed. Work a soft brush on valve covers, caps, and flat panels; rinse low-pressure. 
  5. Dry + Dress. Towel-dry, blow out crevices, then finish plastics/hoses with a water-based dressing for a uniform, dark sheen. Reconnect what you covered.

Dilution Cheat Sheet (So You Don’t Guess)

Dialing in dilution is the difference between “wow, that cleaned up nice” and “why does this plastic look tired?” Concentrates give you power and control, so you can tune your engine degreaser to the mess in front of you instead of blasting everything with a one-strength-fits-none mix. If you’ve ever wondered what 6:1 actually means, it’s six parts water to one part product (think 24 oz water + 4 oz cleaner in a 28–32 oz bottle). 

Pro move: keep two clearly labeled sprayers—one mixed stronger for gnarly jobs, one milder for quick maintenance, so you’re not guessing mid-detail.

Here’s a dilution cheat sheet:

  • Signature Series Orange Degreaser: ~6:1 for heavy, 10 to 15:1 for medium, 25 to 40:1 for light. Spray, briefly dwell, scrub if needed, rinse thoroughly.
  • All Clean+: Ships full-strength; dilute to suit the job (light to strong) across plastics, wheels, and engine parts. Use our dilution chart if you like numbers.
  • Nonsense: Super-concentrated; mix to the mildest ratio that gets the job done for sensitive areas and wipe residue completely.

Always test on a cool, inconspicuous spot first and keep chemistry off hot components. When in doubt, step down in strength and reapply rather than jumping to “full send.”

Wrap-up tips so your ratios actually work for you: mix with cool water, shake to combine, and never let product dry on the surface, short dwell, a little agitation, then rinse and dry. Don’t cocktail cleaners together; pick the right one and stick with it. If you’re working around sensitive plastics or aftermarket bits, start with Nonsense at a light mix and escalate only if needed. Finish by dressing plastics and hoses after they’re dry, your bay will look uniform and stay cleaner longer.

Keep Your Engine Looking New With Engine Degreaser

The MVPs: Chemical Guys Picks For Engine Degreaser

When your bay needs more than a wipe-down, these are our go-tos. For baked-on oil and diesel film, Signature Series Orange Degreaser brings concentrated citrus muscle – the heavy-duty engine degreaser you reach for when things are truly grimy. For routine cleanups across plastics, hoses, and painted bits, All Clean+ is the versatile workhorse you can dial in with dilution. Prefer dye- and fragrance-free? Nonsense gives precision cleaning around sensitive finishes without adding scent. And if you want a grab-and-go setup, the Clean Engine Bay Starter Kit bundles cleaner, tools, and dressing so you can degrease, dry, and restore that even, factory-fresh look in one pass.

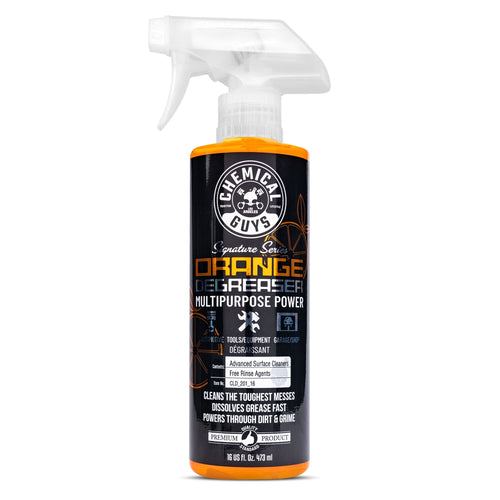
Signature Series Orange Degreaser (Heavy-Duty, Concentrated Muscle)

When the bay is properly grimy, think oil, coolant, diesel residue – go with this citrus-powered, professional-strength engine degreaser. It’s concentrated for flexibility and built to break down the nasty stuff on engines, undercarriages, tools, and tires; dilute for the task at hand and rinse clean.

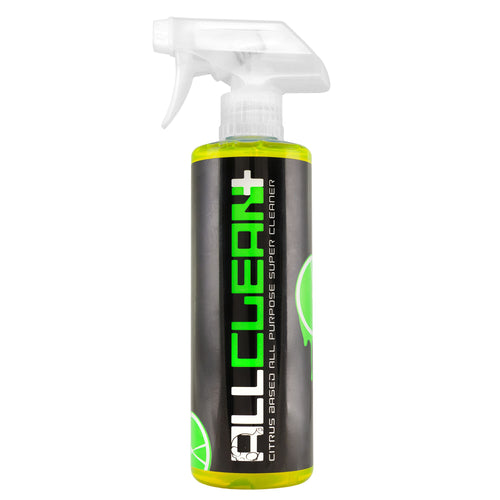
All Clean+ All-Purpose Cleaner & Degreaser (Versatile Daily Workhorse)

For mixed messes and regular upkeep, All Clean+ brings citrus cleaning power you can tune with dilution. Use it on plastics, vinyl, rubber, wheels – and yes, engine bay parts – when you want strong cleaning without going nuclear.

Nonsense Invisible Super Cleaner (Colorless, Fragrance-Free Precision)

If you’re working near sensitive finishes, or just prefer no added dyes or scents, Nonsense is your stealth cleaner. It’s super-concentrated, pH-balanced, and safe across interiors, wheels, and engine bay plastics when properly diluted.

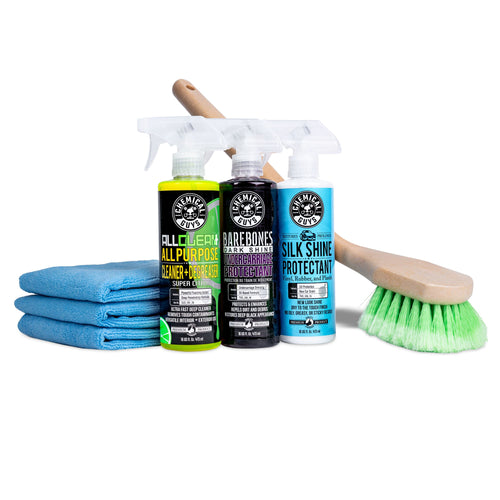
Clean Engine Bay Starter Kit (Bundle It And Be Done)

Want a grab-and-go setup? The All Season Clean Engine Bay Starter Kit pairs All Clean+ with brushes, towels, and dressings so you can clean, dry, and dress without hunting for tools. It’s the simple way to standardize your routine.

Pre-Game: Quick Prep That Saves Time

Before you even grab the trigger, set yourself up for a no-drama clean. Park in the shade and let the engine cool so your engine degreaser won’t flash-dry on hot parts. Pop off big plastic covers if they lift easily, more access means less product and scrubbing later. Brush away leaves and dust around the cowl and hood hinges so you’re not rinsing debris into the bay. Cover the intake, alternator, and battery/terminals with plastic or towels, and snug any loose caps on oil, coolant, and washer reservoirs. A light pre-rinse with low pressure will float off grit; now your chemistry can hit actual grime instead of fighting a dirt blanket.

Troubleshooting: Streaks, Chalky Spots & Missed Grease

If things don’t look perfect on the first pass, don’t panic – adjust and re-run the play. Streaks or chalky residue usually mean product dried on the surface or was mixed a bit hot; mist the area with a milder engine degreaser or an all-purpose cleaner, agitate briefly, and rinse, then dry thoroughly. Water spots on plastics fade when you follow with a light, water-based dressing after drying; it evens out tone and helps repel dust. Still seeing oily film in corners? Reapply to the trouble spot, let it dwell a touch longer, and work a soft detailing brush into seams and around caps before a controlled rinse. Finish by popping the car in the sun or using compressed air to chase water out of crevices, clean, dry surfaces are what make that “like-new” bay actually last.

Aftercare: Keep That Clean Bay Cleaner, Longer

You’ve rinsed, dried, and admired your work, now lock it in. After using your engine degreaser, take two minutes to dress rubber hoses and plastic covers with a light, water-based protectant like VRP. It restores an even, rich tone without turning the bay into a dust magnet, and it makes the next cleanup faster because grime doesn’t stick as hard.

Do a quick post-drive check later that day: pop the hood, make sure everything’s dry, and look for any fresh seepage you might have uncovered (clean bays make tiny leaks obvious). For maintenance between deep cleans, mix a mild All Clean+ in a labeled sprayer and do a light wipe-down during wash day, no soaking, just a mist on a microfiber and a once-over on flat plastics and painted bits. Keep chemicals off hot components, avoid pressure-washing under the hood, and you’ll stretch that like-new look for months.

Finish & Protect (The 5-Minute Upgrade)

A clean bay looks even better with a quick dressing pass. After drying, apply a light coat of a water-based dressing to rubber hoses and plastic covers to restore that deep, even tone – without tacky residue that attracts dust. If you prefer a kit approach, the Clean Engine Bay Starter Kit includes what you need to clean and dress in one run.

Read also:

Frequently Asked Questions

Can I spray water in the engine bay?

Yes – with prep and restraint. Work on a cool engine, cover the intake/alternator/battery, and stick to a garden hose or low-pressure rinse from a distance. High pressure can force water where it doesn’t belong; low pressure plus good drying is the safe bet.

What's the difference between an engine degreaser and an all-purpose cleaner?

A dedicated engine degreaser like Signature Series Orange is blended to break down oils, fuel residue, and heavy grime fast, perfect for leak-prone or neglected bays. All-purpose cleaners like All Clean+ or Nonsense are more versatile for routine dirt and plastic-safe cleaning. Pick based on soil level and surface sensitivity.

How strong should I mix the engine degreaser?

Follow product guidance and start mild. Orange Degreaser can be mixed from ~25 to 40:1 (light) down to ~6:1 (heavy); All Clean+ and Nonsense are both concentrated, so dilute for the job and escalate only as needed. The CG Dilution Chart helps you nail ratios.

Do I need to disconnect the battery?

It’s smart to at least cover and isolate the terminals; many techs remove or bag the battery for extra peace of mind. The goal is preventing water from bridging electrical points while you rinse and scrub, then drying thoroughly before reconnecting. 

Can degreaser damage plastics or paint?

Used correctly and at the right dilution, our recommended products are safe for typical under-hood plastics, painted metals, and rubber. Always work cool, don’t let chemicals dry on surfaces, and rinse/dry completely. Test a small spot first if your vehicle has sensitive or aftermarket finishes. 

What if the engine bay is really greasy?

Go heavy-duty: mix Signature Series Orange Degreaser at a stronger ratio, allow a short dwell, and agitate with a soft brush before rinsing. Repeat in passes rather than nuking with an overly hot mix on the first try. Finish by dressing plastics for an even, dark look.