| Effortless Car Interior Care: Introducing Total Interior and VRP Wipes | |
| How to Properly Dry Your Car After Washing | |
| How to Clean Your Car Interior: A Step-By-Step Guide |
| Exterior How-To's | |
| Interior How-To's | |
| Drying How-To's | |
| Latest Innovations | |
| Ceramic How-To's | |
| Detailing University |
Everyone’s heard about polishing your ride, but have you been let in on the dirty little secret of the car detailing world? It’s time to spill the beans: Car Glaze!
Think of car glaze as the ultimate party trick for your paint job. These magical potions are packed with micro-refined oils, fillers, and leveling agents that swoop in to rescue your car from those pesky swirls and scratches. Those tiny cuts and grooves are like the annoying party crashers that mess with your car’s otherwise flawless look. Glaze smooths over those troublemakers, turning your ride into a slick, mirror-like finish that makes the light bounce off like it’s been to a spa day. So, get ready to watch your car shine like it’s been kissed by a thousand suns!
Who Uses Car Glazes?
Detailers use glazes like magic potions to fill in those sneaky scratches and swirls that refuse to disappear, or the ones that just couldn’t be bothered to leave. Any Chemical Guys Glazes will make your car look so wet and glossy, that even your grandmother will think it’s a freshly poured puddle of awesomeness. Car enthusiasts reach for glazes when they’re short on time or patience but still want to impress—because who has the time for a full correction when you’ve got Netflix and snacks waiting? And show car owners? They use glazes to turn their ride into a mirror that not only reflects light but also reflects their undying commitment to car perfection. Shine on, you crazy diamond!
Prepare Your Gear
How to Choose the Right Glaze
Choosing the Right Car Glaze:
- Paint Type: Know your car’s paint—like knowing if your shoes are leather or suede. Most cars have a clear coat, so pick a glaze that plays nice with it.
- Paint Color: Dark car? Go for a glaze that deepens the color like a black hole. Light car? Choose one that brightens it up like a disco ball.
- Gloss Level: Want your car to shine like a diamond or just a tad glossier than your average pizza box? Pick a glaze that matches your desired sparkle.
- Scratch-Filling Power: If your car has more scratches than a cat on a scratching post, get a glaze that fills those in like it’s spreading peanut butter on toast.
- Ease of Use: Choose a glaze that’s as easy to apply as spreading butter on toast. No one needs extra drama in their car detailing routine.
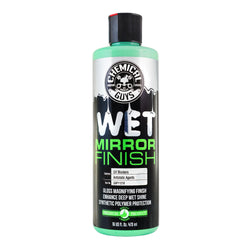
Chemical Guys Picks

Gives your car a shine so bright it might need sunglasses.

Fills in imperfections and makes your paint look wet and fabulous.

Perfect for dark colors—like a spotlight for your ride.
Prepare the Vehicle
Step 1: Wash Your Car

Start by giving your car a bubble bath with your favorite Chemical Guys soap! It’s like a glow-up day for your ride—washing away all that dirt and grime to keep the paint pristine. That way, when you apply glaze, you won’t be scratching your head (or your car’s surface) wondering why things aren’t looking shiny!
Read More: How to Wash Your Car
Step 2 (Optional): Clay Your Car

If your paint surface feels rougher than a cactus and less smooth than a baby’s bottom, it’s time to give your car a clay treatment! Think of it as the ultimate pre-glaze pampering session—getting rid of all the nasty stuff so your glaze can bond directly to the paint. It’s like filling in the cracks in your car’s “skin” so it can look smooth and fabulous!
Read More: How to Clay Bar Your Car Properly to Decontaminate Paint
Step 3 (Optional): Polish Your Vehicle's Paint

For top-notch results, give your paint a good polish to tackle those heavy scratches and swirls like a pro. Think of it as prepping your car for a red carpet event—get rid of the big flaws so the glaze can swoop in and smooth out the tiny paint imperfections. This way, your paint will shine like it’s auditioning for a Hollywood blockbuster!
Apply Glaze
Step 4: Dispense the Glaze

Dab just a few tiny dots of glaze onto your microfiber applicator—think of it as giving your car a light spritz of cologne. Less is more, so don’t go overboard. Spread the glaze evenly on the applicator to avoid any blotchy mess—no one wants their car to look like a tie-dye experiment!
Step 5: Work the Glaze Into the Surface

Work the glaze into the paint with your Microfiber Applicator like you’re giving it a gentle massage. Use a crosshatch motion—like you’re making a crisscross pattern on a giant canvas—to spread the glaze evenly. If your applicator starts to look a little dry, add a bit more glaze. Let it sit for 20 minutes to give your car a chance to enjoy its spa treatment before moving on to the next step!
Step 6: Buff the Surface

After giving the glaze 20 minutes to set and work its magic, grab a 2-Faced Microfiber Towel and buff away the excess. It should come off smoother than a dance move at a wedding, leaving you with a dazzling, high-shine finish that’ll make your car look like it’s ready for a photoshoot!
Pro-Tip: Save Time Using a Dual Action (DA) Machine for Application
Did you know you can apply glaze with a DA machine? That’s right—let the power of TORQ do the heavy lifting! Using a DA machine like the TORQ10FX or TORQ15DA with a Black Hex-Logic Finishing Pad lets you cover more surface area in less time. It’s like having a personal car-detailing superhero at your service!
TORQ DA Machine Application

Just rinse and repeat Steps 1-3 as usual. For Steps 4-6, swap out the Microfiber Applicator for a Black Hex-Logic Finishing Pad and let your TORQ DA machine take over.
It’s like upgrading from a tricycle to a race car—save time and still get all the dazzling glaze benefits!
Maintaining Your Glazed Finish
How Long It Lasts:
- Glaze Quality: Think of it like the difference between a fancy moisturizer and a budget brand. The better the glaze, the longer it sticks around, keeping your car’s shine on point.
- Paint Condition: If your car’s paint is smoother than a buttered biscuit, the glaze will stay put. But if it’s rougher than a porcupine’s back, it might not last as long.
- Weather & Conditions: Just like how your hair frizzes up in the rain, your glaze can wear off faster in harsh weather. Protect it from the elements, or it’ll be as temporary as a sunburn!
When to Reapply:
- Wash Frequency: If you’re washing your car as often as you change your socks, the glaze might not last as long. Reapply whenever you notice it losing its sparkle—like refreshing your look after a long day.
- Detailing Routine: Add glaze reapplication to your automotive detailing playlist. If you’re polishing regularly, that’s the perfect time to slap on a fresh layer. Think of it as a little tune-up for your car’s beauty routine.
- Performance Check: If your glaze isn’t shining or repelling water like it used to, it’s time for a touch-up. It’s like knowing when it’s time to toss those old sneakers for a fresh pair.
Enhance That Shine!
In conclusion, applying glaze to your car is like giving it a VIP treatment at a five-star spa—minus the cucumber slices and the awkward small talk. By following these steps, from washing and claying to buffing and admiring your shiny ride, you’re ensuring your car gets the star treatment it deserves. Whether you’re using a microfiber applicator or letting your TORQ DA machine do the heavy lifting, a little glaze goes a long way in keeping your paint looking slick and sensational. Remember, just like with any great beauty routine, keeping an eye on the performance and timing your reapplications will keep your car’s shine on point. So, gear up, get glazy, and let your car sparkle like it’s ready for the red carpet!
Common Questions about Car Glaze
How is glaze different from polish or wax?
- Glaze: Think of it as makeup for your car. It enhances the paint’s appearance by filling in minor scratches and adding a glossy finish. No protection—just pure shine.
- Polish: The paint’s personal trainer. It removes scratches and swirls to smooth out the surface and restore clarity, prepping it for the next steps.
- Wax: The protective shield. It adds a layer of defense against the elements and gives your car a long-lasting shine, like a weather-resistant jacket.
Does glaze go on before or after wax?
Glaze typically goes on before car wax. It's the finishing touch before you add a protective layer of wax.
What happens if you apply wax over glaze?
It's not the end of the world, but your car might not reach its full "wow" potential. Here’s what could happen:
- Reduced Effectiveness: Your wax might decide it doesn’t want to play nice with the glaze. Instead of bonding like besties, it could just slide off, leaving your paint more vulnerable than a superhero without a cape.
- Diminished Shine: That high-gloss glaze? It might lose its sparkle under the wax, kind of like dimming the lights at a party when the dancing just got good.
- Less Longevity: The protective benefits of the wax could be short-lived if it can’t properly bond to the surface, meaning your car’s shine might fade faster than a summer tan.
So, for a dynamic duo, apply glaze before wax to keep your car looking like it just rolled off the showroom floor!
Does glaze need a top coat?
Yes, glaze typically needs a top coat, usually in the form of wax or sealant. While glaze adds shine and fills in minor paint imperfections, it doesn’t offer protection on its own. A top coat of wax or sealant locks in that glossy finish and provides a protective barrier against the elements, keeping your car looking its best for longer. So, think of the top coat as the cherry on top of your car’s detail job!
How many coats of glaze should you apply?
One coat of glaze is like the perfect scoop of ice cream—just enough to do the job. Stacking extra layers won’t make it shinier, but it might give you more work to clean up! So, keep it simple and stick to one coat for that sweet, smooth finish!
Do you seal over glaze?
Heck yes, you should seal over a glaze! Think of it like locking in that killer look with a protective layer. You didn’t put in all that work just to let the shine fade away, right? Slap that sealant on and keep your ride looking fierce and flawless for the long haul!