| Effortless Car Interior Care: Introducing Total Interior and VRP Wipes | |
| How to Properly Dry Your Car After Washing | |
| How to Clean Your Car Interior: A Step-By-Step Guide |
| Exterior How-To's | |
| Interior How-To's | |
| Drying How-To's | |
| Latest Innovations | |
| Ceramic How-To's | |
| Detailing University |
Have you ever seen a newly detailed car with faded trim? It ruins the whole look. Your vehicle’s vinyl, rubber, or plastic trim can seem minor, but it makes a huge difference in the overall look of your car.
Black trim fades primarily due to UV radiation, which breaks down the chemical bonds in the plastic, causing a noticeable loss of color. This deterioration is also driven by oxidation from dirt and contaminants as well as general wear and tear over time, all of which contribute to the gradual fading and dulling of the trim’s appearance.
Applying a dressing to your trim or vinyl will give it a deep shine and protect it against grime, dirt, and the elements. Follow these simple steps to make your faded trim look new again.
Prepare Your Gear
Restoring and maintaining the look of your black trim requires just a few essential products and minimal time.
- Trim Clean or Nonsense for Vinyl
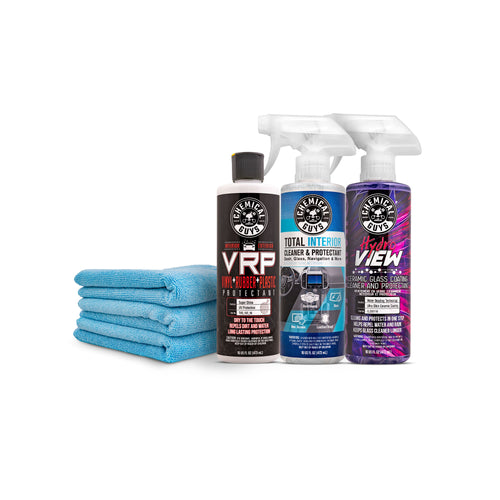
Specially formulated to remove dirt and oils, these cleaners prep your trim for a lasting bond with the protectant. - VRP Vinyl, Rubber, Plastic Shine and Protectant
VRP is your go-to for adding a layer of protection and a beautiful shine, helping keep your trim looking new. - Microfiber Towel and Applicator
A soft microfiber towel ensures gentle, effective cleaning, while an applicator helps you apply the dressing evenly for a flawless finish.
Step 1: Clean the Car Trim

Get rid of all that gunk. Clean off those old dressings, body oils, and wax leftovers. They’re just layers of clutter on the surface and stopping your new trim dressing from sticking. You need a clean slate to make the magic happen.
- Grab a trim cleaner like Trim Clean (or if you’re feeling wild, use Nonsense for vinyl). Spray it onto a microfiber towel—don't just douse your car like it's a waterpark.
- Wipe the trim gently to banish all the old grime and buildup.
- Now, give it a quick buff and watch that trim shine.
Step 2: Apply the Dressing

Ready to bring your faded trim back from the dead? Applying a dressing is like giving it a rejuvenating color boost. It restores that lost sheen while slapping on a protective layer to guard against UV rays, dirt, and future fading. This magic potion dives deep into the trim, giving it a fabulous makeover and a long-lasting finish.
Grab yourself a dedicated trim dressing like VRP Vinyl, Rubber, Plastic Shine and Protectant—this stuff is the real deal!
- First, give that bottle a good shake to get everything mixed up.
- Next, apply 2-5 sprays or a few drops onto a foam or microfiber applicator pad.
- Now, spread that dressing evenly over the trim's surface like you’re icing a cake.
- Finally, gently massage it in to make sure it fills all those little pores. Your trim will be looking so good, it might just start strutting its stuff!
Step 3: Buff the Trim Surface

Time to buff away the excess dressing and let your trim shine like the star it's meant to be. This step is about achieving a smooth, polished look that’ll have your vehicle turning heads. Plus, it keeps things looking even and natural, so you don’t end up with a blotchy mess.
Grab a clean microfiber towel and get ready to work that magic!
- Give the trim a good buff to remove any leftover dressing, leaving it looking fresh and fabulous.
- Now, sit tight for about 5-10 minutes to let the dressing settle in its new digs before you consider adding more layers. (Remember, good things come to those who wait.)

Frequent Questions about Restoring Trim
How often should I reapply the dressing?
Depending on how much your trim loves the outdoors, give it a little TLC every 1-3 months to keep that color vibrant and the protection game strong. After all, a little regular love goes a long way in keeping your ride looking sharp.
Will the dressing prevent future fading?
Yup! Quality dressings pack a UV-fighting punch that keeps your trim looking fresh by minimizing fading and cracking over time. It’s like sunscreen for your car—because who wants a car that looks tired?
Can I use the same dressing on both rubber and plastic trim?
VRP by Chemical Guys is your all-in-one hero for rubber, plastic, and vinyl—hence the name, (VRP). If you're using a different dressing, just check the label to make sure it’s safe for all those surfaces. You wouldn’t put sunscreen on your shoes, right?
What if I accidentally get dressing on paint or glass?
No worries! If some dressing creeps onto your paint or glass, just grab a quick detail spray and wipe it away for a spotless, flawless finish.
How long should I wait between layers?
Give it 5-10 minutes to set before layering on more if you want that extra shine and depth.
Should I use a heat gun to restore my faded trim?
A heat gun might bring some life back to faded trim by drawing oils to the surface, but it’s more of a quick fix than a lasting solution. Over time, the heat can dry out the plastic, leading to even more fading and cracking. Stick to a quality trim dressing for long-term results—it nourishes and protects, keeping your trim looking fresh without the risk of heat damage.